
Screen printing on wood is a delightful and creative way to enhance your woodworking projects, whether you're making custom signs, art pieces, or decorative items. This process allows you to apply intricate designs and vibrant colors, transforming plain wood into stunning works of art. In this guide, I will walk you through the step-by-step process of screen printing on wood, ensuring you have all the knowledge and tools needed to create beautiful prints. Let’s dive in!
Step-by-Step Guide to Screen Printing on Wood
Gather Your Materials
Before embarking on your screen printing journey, it's essential to gather all necessary materials. Here’s a comprehensive list to get you started:
- Wood Surface: Choose a piece of unfinished wood. Plywood works well, but ensure it’s smooth and free from any varnish or sealants.
- Screen Printing Frame: A standard screen printing frame will suffice. I recommend using one with a mesh count of around 110 to 160 for optimal ink transfer.
- Stencil Material: You can use vinyl or other stencil materials. Craft vinyl is excellent for creating detailed designs.
- Ink: Select the right ink for your project. Water-based inks are eco-friendly and penetrate the wood well, while plastisol inks sit on top and may not adhere as effectively.
- Squeegee: A squeegee will help spread the ink evenly across the screen.
- Adhesive: Use a water-based pallet adhesive to keep the wood in place during printing.
- Curing Equipment: Depending on your preference, you may need a heat gun, conveyor dryer, or simply allow the ink to air dry.
- Protective Gear: Gloves and a mask are advisable to protect yourself from ink fumes and stains.
Once you have all your materials ready, you're set to begin the exciting process of printing on wood!
Prepare the Wood Surface
The first step in screen printing is to prepare your wood surface. Here’s how to do it effectively:
- Sand the Wood: Start by sanding the wood to achieve a smooth finish. Use fine-grit sandpaper to remove any rough spots or imperfections. This step is crucial as it ensures that the ink adheres well and produces a clean print.
- Clean the Surface: After sanding, wipe the wood with a damp cloth to remove dust and debris. Allow it to dry completely before proceeding.
- Apply Adhesive: To prevent the wood from shifting during printing, apply a thin layer of water-based pallet adhesive to the surface. This will help keep the wood in place and ensure a precise print.
Create Your Stencil
Creating a stencil is a fun and creative part of the screen printing process. Here’s how to make one:
- Design Your Image: Use graphic design software or hand-draw your design. Keep in mind that simpler designs with bold lines work best for screen printing.
- Cut the Stencil: If you’re using vinyl, cut out your design using a vinyl cutter or craft knife. Be sure to remove the negative space so that the design can be printed onto the wood.
- Transfer the Stencil: Carefully transfer your stencil onto the screen printing frame. Use transfer tape if necessary to ensure accurate placement.
Read more: Top Hoodie Print Placements: Make Your Hoodie Stand Out
Prepare Your Screen
Now that your stencil is ready, it’s time to prepare your screen for printing:
- Attach the Stencil: Place the stencil on the screen, ensuring it is centered and aligned correctly. Use tape to secure the edges of the stencil to the screen.
- Check Off-Contact: Ensure there is about 1/8 inch of off-contact space between the screen and the wood. This allows the ink to flow smoothly without smudging.
- Test the Setup: Before printing on your final piece, do a test print on a scrap piece of wood to ensure everything is set up correctly.
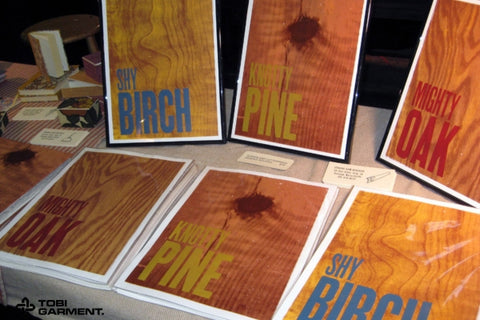
Choosing the Right Ink for Wood
Selecting the right ink is vital for achieving vibrant and lasting prints. Here are the main types of ink you can use for screen printing on wood:
Plastisol Ink
- Characteristics: Plastisol ink is thick and sits on top of the wood surface. It provides vibrant colors and is durable.
- Best Use: Ideal for designs with bold colors and less detail. However, it may not adhere well to all wood types.
Water-Based Ink
- Characteristics: Water-based inks penetrate the wood, creating a softer finish that feels part of the wood.
- Best Use: Excellent for detailed designs and eco-friendly projects. It dries quickly and can be cured naturally or with heat.
Solvent-Based Ink
- Characteristics: Solvent-based inks are durable and water-resistant but can be more challenging to work with due to their fumes.
- Best Use: Suitable for outdoor projects where durability is crucial.
Read more: Easily Print T-Shirts at Home with a DIY Kit Today!
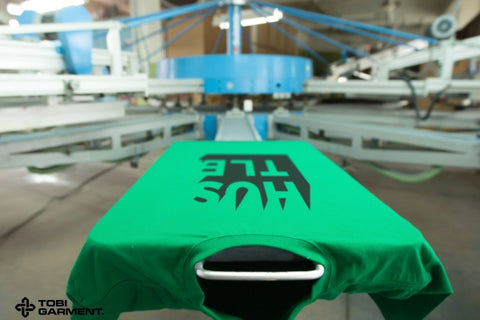
Applying the Ink to the Wood
With your materials ready and your screen prepared, it’s time to apply the ink. Follow these steps for a successful application:
Positioning the Stencil
- Align the Screen: Carefully position the screen over the wood, ensuring it is aligned with your design.
- Check Adhesion: Make sure the wood is still secured with adhesive to prevent any movement.
Applying the Ink
- Load the Ink: Squeeze a line of ink along the top edge of the screen.
- Use the Squeegee: Hold the squeegee at a 45-degree angle and pull it down across the screen with even pressure. This action will push the ink through the stencil and onto the wood.
- Repeat: Depending on the opacity desired, you may need to repeat the process several times. Be careful not to over-saturate the wood.
Removing the Stencil
- Lift the Screen: Carefully lift the screen straight up to avoid smudging the print.
- Inspect the Print: Take a moment to admire your work! If you notice any imperfections, you can touch them up later.
Read more: Understanding Raster and Vector Images: A Beginner's Overview
Curing the Ink
Curing is an essential step that ensures your print is durable and long-lasting. Here are three methods to cure your ink:
Natural Drying
Process: Allow the printed wood to air dry for several hours. This method is simple but may take longer for the ink to fully set.
Heat Curing
Process: Use a heat gun or conveyor dryer set to around 270 degrees Fahrenheit. Pass the wood through the heat source multiple times, ensuring even curing without scorching the wood.
UV Curing
Process: If you have access to a UV curing lamp, this method is effective for quick curing. Expose the printed area to UV light for the recommended time based on the ink used.
Finishing Touches
Once the ink is cured, it’s time to add the finishing touches to your project:
Sealing the Ink
- Choose a Sealant: Select a clear wood sealant that is compatible with your ink. This step is crucial if your project will be exposed to moisture or outdoor elements.
- Apply the Sealant: Using a brush or spray, apply a thin layer of sealant over the print. Allow it to dry completely before handling the wood.
Adding Additional Details
- Enhance Your Design: Consider adding embellishments, such as wood burning or additional paint details, to make your design pop.
- Final Inspection: Once everything is dry, inspect your work for any final adjustments or touch-ups.
Read more: How to Screen Print Business Cards: A Step-by-Step Guide
Conclusion
Screen printing on wood is a rewarding and enjoyable process that allows you to express your creativity. By following these detailed steps, you can create stunning wood prints that showcase your designs beautifully.
FAQ
1. What type of wood is best for screen printing?
Unfinished, smooth wood is ideal for screen printing. Plywood is a popular choice due to its affordability and availability.
2. Can I use regular paint for screen printing on wood?
While you can use regular paint, it’s best to use inks specifically designed for screen printing to achieve the best results.
3. How do I prevent ink from bleeding under the stencil?
Ensure proper off-contact distance between the screen and wood, and use a high-quality adhesive to secure the stencil.
4. How can I clean my screen after printing?
Use warm water and a gentle scrub brush to clean the screen immediately after use. Avoid letting the ink dry on the screen.
Read more related posts from Tobi Garment: